Category Archives: House

A Minor Prairie-Style Mystery

A small fragment of a Popular Mechanics cover contains the image of a prairie style house.
The reverse of a Popular Mechanics cover fragment contained an intriguing prairie-style house.

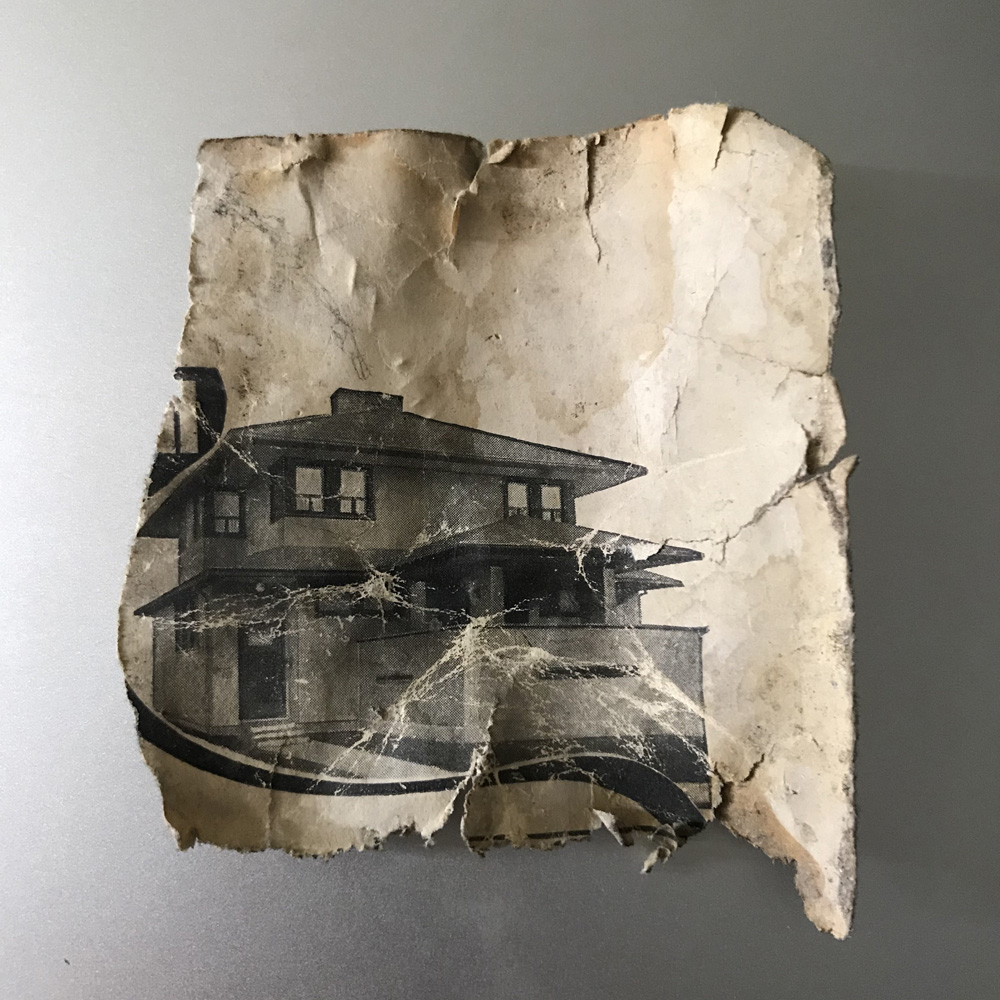
I recently dismantled our chimney as part of our basement renovation. Opening walls and floors hasn’t surfaced any Goonies treasure maps or confederate dollars–to date the most memorable items have been a site-made marking gauge, eye-searing linoleum, depression era-newspapers, and a hundred-year-old apple core–but this most recent demolition did turn up a fragment of an old Popular Mechanics cover. I probably wouldn’t have paid it any attention, but the inside of the cover featured a photo of a two-story Prairie-style home which piqued my curiosity. The cover provided a month, but no year. Based on the style of house, I thought I’d have at most a couple of decades of Popular Mechanics to check. I like Google Books, the Hathitrust digital library, and Internet Archive for this kind of archival research. As someone who spent a lot of time as an undergraduate and grad student in library stacks, there’s a luxury to being able to sift through old volumes from the comfort of my couch.

Continue reading

Shaker Peg Board Revisited

Shaker peg board offers a flexible storage solution accomodating a variety of goods. Here chairs have been hung to open the floor for sweeping.

While I’ve written about Shaker peg board before, a trip to two Shaker communities (the Mt. Lebanon, NY and Hancock, MA communities are close enough to visit in a single trip, but go to the Hancock community if you only have time for one) gave me a chance to get close up with several samples of original and reproduction

Continue reading

Basement Door

Before and after replacing an old basement door.
After a hundred years of abuse and neglect, it was time for a new door. The salvaged fir door in a clear finish matches the front door of the house.

As our laundry room took shape, the old basement door stood out, it’s faded, haphazard paint, split panels and cutout for a defunct dryer vent contrasting sharply with fresh paint and new trim and cabinets.

I’d entertained the idea of installing a glazed door of some sort to let more light into the basement, but shockingly prices took me to the local architectural salvage yard. An hour spent in a freezing warehouse yielded a new door in fir (coincidentally matching our front door) in roughly the right size.

To bring the door to final size, I ripped and cross cut it with a tracksaw. Rather than try to fit the not-quite-square opening, I cut the door to the smallest of three measurements I took for height and width. Tbe results might not look as polished as cutting and planing to a perfect reveal, but the door fit in the opening with no fine tuning. After a light sanding with 220 grit to clean up the door, I vacuumed it clean and wiped on three coats of satin Polycrylic.

Having removed the pre-cut hinge mortises when I trimmed the door to final width, I had to cut new mortises. I transferred the hinge location to the door from the frame and laid out the new mortises, then used my trim router to rough out the joints before fine tuning with a chisel. I could then hang door and install hardware. The door had been pre-drilled for a lockset, but I had to drill another series of holes for the deadbolt, a task greatly simplified by a jig. After transferring the latch locations to the door frame by rubbing a pencil along the latches and shutting the door, I marked and cut the mortises for the latch plates.

PermaDry Waterproofing Installs a Perimeter Drain

perimeter drain installation

Contractors cut a trench in the basement floor to install a perimeter drain and sump pump.

Like most older homes in our area, ours suffers from water intrusion in heavy rain, with water running across the floor to a sump previous owners had installed. It was tolerable, if annoying, when we used the basement for laundry, storage, and shop space, but it was a problem we needed to solve if we were going to renovate with an eye to adding living space. I briefly considered installing a perimeter drain myself following the instructions on familyhandyman.com, but the thought of moving tons of earth and concrete didn’t appeal. After reviewing bids from a couple of local companies, we selected PermaDry Waterproofing. While they were slightly higher than other bids, I appreciated their materials choice (perforated PVC over corrugated polyethylene) and design. After some government-shutdown-induced rescheduling, PermaDry brought in two crews to install an interior perimeter drain and sump pump in a single day. Continue reading

Kitchen Exhaust–Cabinet Retrofit

modified cabinet bottom

A duct cutout and new screw holes were required to accommodate the new microwave.

In addition cutting open the house to fit a new duct, I had to modify the cabinet to fit the new microwave. Because the microwave was on order, I found installation instructions online and used them to layout the bottom. I had to drill new mounting holes and a rectangular cutout for the duct, neither of which was especially difficult and further simplified by having the cabinet off the wall. Continue reading

Kitchen Exhaust–Assembling the Duct

Duct drive cleat

A drive cleat joins the ends of two sections of ducts and is then hammered flat to lock the joint.

Rectangular metal duct connects the holes in my kitchen ceiling and exterior wall. I assembled the duct out of three-foot long flat sections, folding two pieces into ell-snapped walls and joining those to form a section of duct. To join the two sections I needed together, I used S-cleats on the long sides drive cleats on the short sides as outlined here. I then sealed the seams with mastic, which seemed to take forever to dry. For the long seams, I opted to use a high-quality foil tape, an approach I’ll use for any future duct work I do given its ease of use and instant gratification.  Continue reading

Kitchen Exhaust–Preparing for a New Duct

external duct opening

Cutting a hole in your house is a bit troubling. Here I’ve squared my opening. A hint of the house’s original green stain is visible on a shingle on the bottom right of the cutout.

Installation of a waterline for an ice maker was prompted by the purchase of a new fridge, which in turn entailed replacing the stove and over-the-range (OTR) microwave to ensure matching finishes (fortunately the dishwasher was an integrated model and concealed behind cabinetry).

Continue reading

Ice Maker Waterline

water line outlet box

An outlet box neatly finishes the new line.

After a decade of frozen drain lines and inner shelves dripping with water, we were ready to retire our old fridge. We were also ready to retire our ice trays–it was past time to install a waterline for an ice maker. After completing the work in hours, I regretted not doing in much sooner. Continue reading