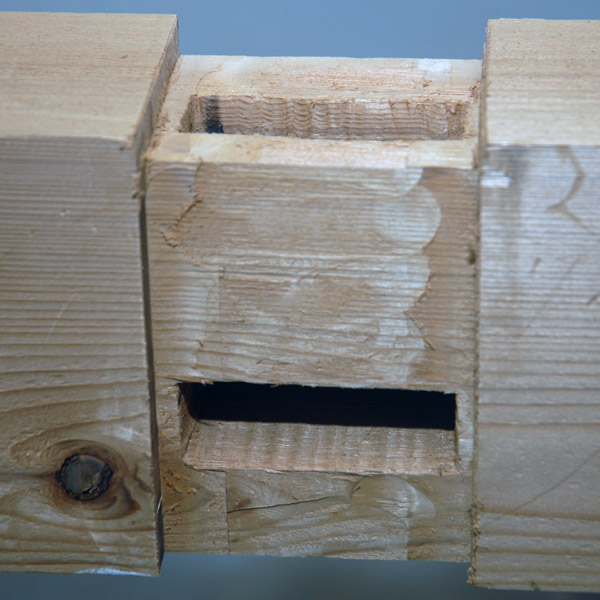

After defining the tenon shoulders with a handsaw, I cut the cheeks on the bandsaw, then tuned with rasp and chisel to fit.
A survey of resource suggested the following considerations for sizing the tenons used in timber frame construction:
- The thickness of the tenon is usually one-quarter the width of the timber but no more than one-third.
- The tenon usually runs the whole width of the member being tenoned.
- The walls of the mortise should be at least the thickness of the tenon.
Since I was working with 4 x 4 and 4 x 6 stock, I made my tenons an inch thick and two inches deep. And since I think a little shoulder is a good thing, I reduced the width of the tenon by a half inch to leave a quarter-inch shoulder on the sides of the tenons. Continue reading