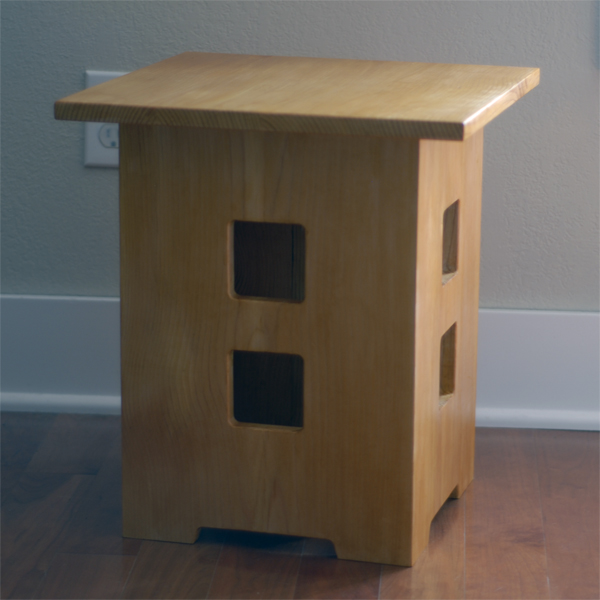
Limbert’s No. 234 side table reproduced in pine.
I’ve admired the No. 234’s design for some time, but at 18 inches, it seems a little short for a side table. Before committing to white oak or cherry for my final project, I rehearsed the build in pine. Since the wide board I picked up had some nice quarter-sawn figure along both edges, I took some time cutting around knots and glued up the top and base. While my panels dried, I prepared the template, laying out the pattern on a piece of plywood and building a quick frame sized for the square cutouts. Using a template for the cutouts on the template requires substantially less time than drilling out the corners of each cutout, sawing close the line and sanding and filing to final shape.
With the template complete, I trimmed the sides to rough size, then used a pattern bit in the router to produce the finished panels. Since this was a prototype, I left the corners of the cutouts and notch for the feet rounded. If I do a more permanent build of the table, I’ll clean up the corners with a chisel, since the original features sharp corners. To produced a clean miter, I used a 45-degree chamfer bit using the template to guide the bit. Once the sides were cut to finished size, I sanded through 220.
To glue the long miters, I laid out the sides against a stop clamped to my bench with the outsides facing up, then ran a strip of packing tape up each joint. I then flipped the assembly over, brushed glue along the mitered edges, and rolled up the base. While the base dried, I trimmed the top to side and sanded it. Then everything got three coats of amber shellac. The top is screwed to the base through cleats glued to two sides.